How to resize your pictures
A number of friends have problems resizing their pictures from their digi cameras. Here, I will show how to do it with Picasa, the photo gallery tool from Google. Initially when I started using this, I was quite confused with the features. But gradually, I found it to be quite useful and powerful.
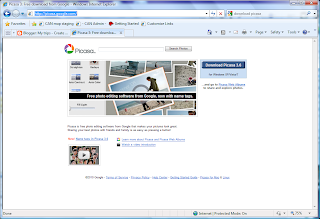
First go to Picasa, and download the application
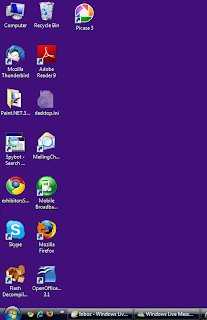
Install the application, and once done, you should see a shortcut like this.
To resize your pictures, first copy your pictures out from your digital camera onto the desktop or a folder of you choice.
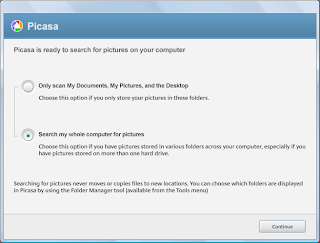
Run the application. If this is the first time, Picasa will ask if you want to scan your computer for pictures. Say yes.
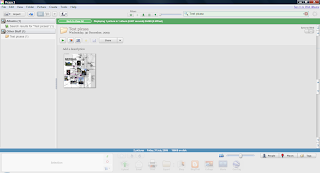
After scanning, you should see plenty of folders of your pictures you have.

You can locate your folder by using the search feature. Very powerful.
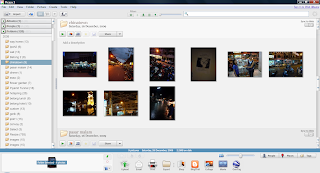
For the pictures that you want to resize, click on the selected folder
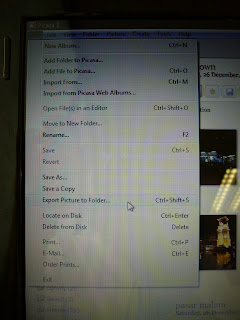
Go to the menu, and select "Export folder"
You will be ask for the folder to put the exported pictures. Key in a new folder. I usually will extend the folder and put the word _resize
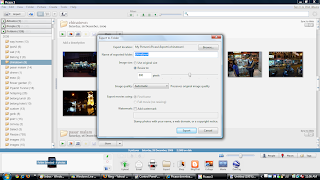
Indicate also the size that you want to resize to

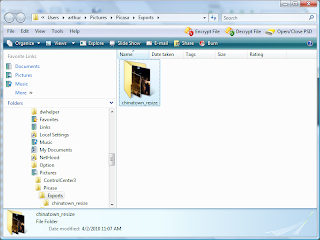
Once the files have been resized, the resized folder will pop up. The resized files will be found in the newly created folder
If you have any need to locate the folder, you can right click and select "locate on disk"

First go to Picasa, and download the application

Install the application, and once done, you should see a shortcut like this.

To resize your pictures, first copy your pictures out from your digital camera onto the desktop or a folder of you choice.
Run the application. If this is the first time, Picasa will ask if you want to scan your computer for pictures. Say yes.

After scanning, you should see plenty of folders of your pictures you have.

You can locate your folder by using the search feature. Very powerful.

For the pictures that you want to resize, click on the selected folder

Go to the menu, and select "Export folder"

You will be ask for the folder to put the exported pictures. Key in a new folder. I usually will extend the folder and put the word _resize

Indicate also the size that you want to resize to

Once the files have been resized, the resized folder will pop up. The resized files will be found in the newly created folder

If you have any need to locate the folder, you can right click and select "locate on disk"


Comments